Extending the number of tabs in the hierarchy
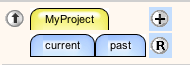
Consider this situation. You've just clicked the "MyProject" tab to reveal two subtabs
as shown here. (You would also be viewing any documents in MyProject, but those are
not shown here.) It looks like the MyProject tab could use another blue subtab called
"future".
Click the plus sign. Note that the background
of the plus sign is blue, indicating addition of a blue subtab.
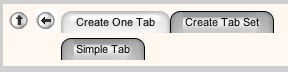
You are taken to a new screen. It has information on the right about what you're doing,
but has the gray action tabs on the left:

Click "Create One Tab" to see a second row of tabs - just one in
this example:
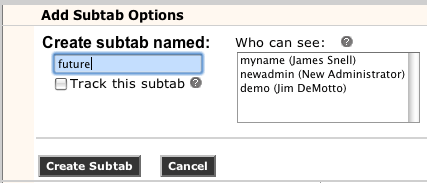
Click the "Simple Tab" action tab and you will see a number of
options, but for now just concentrate on the name field for the new tab. (The color is blue, to
reassure you.) Type in "future."
Note that there is a list of users who will be able to view documents under this tab.
These are the same persons who can access the MyProject tab, and cannot be changed
on this screen.
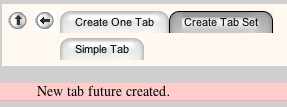
Click "Create Subtab" and at first it will appear that nothing changed.
But just under the action tabs it says that the tab future was created. You can continue
to add simple tabs at the blue level on this screen.
Click the left arrow to return to the document view, or click "Return to Safe"
in the top line. You will see that your new tab is there.
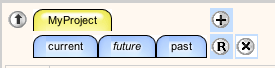
Note that "future" is italic, indicating that there are no documents and no
other tabs under it. Also notice that there is now an X at the end of the tab line. It
appears whenever there is an empty tab, because empty tabs are the only ones that can be
removed. If you don't really want the future tab, you can delete it quickly. If you
don't like the order in which your blue tabs appear,
rename them by adding numbers or letters in front so that they sort
the way you want.